Multiplayer Architecture - Part 1
Phew!! Got here! The most exciting part of the project is here: multiplayer architecture. Throughout these articles, I will be covering in a lot of depth how multiplayer will be implemented in this game’s engine. There are a couple things that will be quite technically difficult, simply due to the nature of the engine: real-time, fast paced, terrain (an asset that all entities share) is entirely modifiable, … But do not worry, we will go through these challenges.
Client - Server model
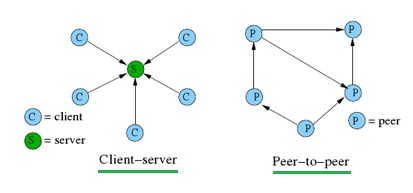
This game is going to use a client-server model, instead of a peer-to-peer model. In peer-to-peer, each person who is playing communicates directly to each other. In client-server, each person will first be communicating to a server, which will then update the game state and relay information back to all the clients.
There are multiple reasons for choosing client-server model:
- Good for scaling
- In peer to peer, someone’s bad connection may cause other players to suffer lag
- It is better for security (and prevents cheating)
- Latency may be lower if the server has good connection
- …
The other thing we will have to keep in mind, is that the server is authoratative over what goes on in the world, which mean cheating will be very hard. This means, that everytime the client does something, the server will have to recalculate what the client just did to see if it is physically possible (basically, client is going to send all of its input - mouse and keyboard, and the server will just reexecute it, and check if the output data of the client was correct) - but we will get into how this works in future articles.
For this one, we will just focus on the low level side of networking, the general organisation that I decided to go with for the project, as well as how joining the server works.
Low level networking
The engine uses the classic sockets API for all network transmissions.
In a nutshell: the way network transmission works is that there are these things called protocols. These basically dictate how the packets that you send over the internet are interpreted and sent. There are two main protocols (at the transport layer of the OSI model) that are usually used: TCP and UDP. The main difference is that TCP guarantees that the packet got received (with a sort of handshake) and UDP does not, we just send a message, and don’t know if it got received. Fast paced games usually use UDP because it is much faster - it is what we will be using. The only downside, is that we will have to take responsibility for all the damage this could cause : packet loss, uncertainty of packet order, … It sounds much worse than it actually is, there are ways, which we will get into, to mitigate this.
The program just creates a UDP socket and binds it to port 6000 (for servers) or 6001 (for clients).
Organisation
You may have noticed that the build script creates 2 executables: vkPhysics_client and vkPhysics_server. The client application just means that the game creates a window to which the game gets rendered to. The server application is just a console application, with no graphics. This means that the vkPhysics_client program could technically run the server, which is what we will be doing for now, so that we can clearly see what is going on from the server’s perspective.
You may also notice, that in the ImGui window, there are buttons: Start server and Start client. By default, the vkPhysics_client program does not go straight into client or server mode, we can choose. If we go into client mode, the program creates a socket which is bound to port 6001, and if we go into server mode, the program creates a socket which binds to port 6000. Then, in the game loop, we update the network module by either calling tick_client() or tick_server(), which will be looking out for packets that concern them (connection request for server, handshake for client, etc…).
The game loop is therefore structured in this way (pseudo code)
void game_loop() {
    while (true) {
        // For Windowed application
        update_display();

        if (running_as_client) {
            tick_client();
        }
        else if (running_as_server) {
            tick_server();
        }

        tick_world();

        render();

        // ...
    }
}
In both of these functions, there is a simple check to see if we’ve received packets: if we have, check what the packet type is (connection request, handshake, player joined, full game state, etc…).
Joining the server
Note, that all UI stuff is simply ImGui stuff for now, in future, we will also implement GUI for the engine.
In the ImGui window, there are two text fields: Connect to and Client name.
If you pressed on Start client, and therefore are running a client, you can fill Connect to with an IPv4 address, and Client name with an ASCII string, then press Request Connection. What happens here, is in the engine’s internal event system, a connection request event gets triggered, captured by the network module, which then creates a connection request packet.
In the server application (actual code):
network_address_t received_address = {};
int32_t received = n_receive_from(
    main_udp_socket,
    message_buffer,
    sizeof(char) * MAX_MESSAGE_SIZE,
    &received_address);

if (received) {
    serialiser_t in_serialiser = {};
    in_serialiser.data_buffer = (uint8_t *)message_buffer;
    in_serialiser.data_buffer_size = received;

    packet_header_t header = {};
    n_deserialise_packet_header(&header, &in_serialiser);

    switch(header.flags.packet_type) {

    case PT_CONNECTION_REQUEST: {
        s_process_connection_request(
            &in_serialiser,
            received_address,
            events);
    } break;

    // case ...
    // ...

    }
}
We simply check what the packet type is, and interpret it accordingly.
s_proces_connection_request will then add the player to the game, and send to all the other clients a packet (player joined packet), basically telling them a new player arrived, and we have to add them to the local game state as well!
Here is a quick demo!
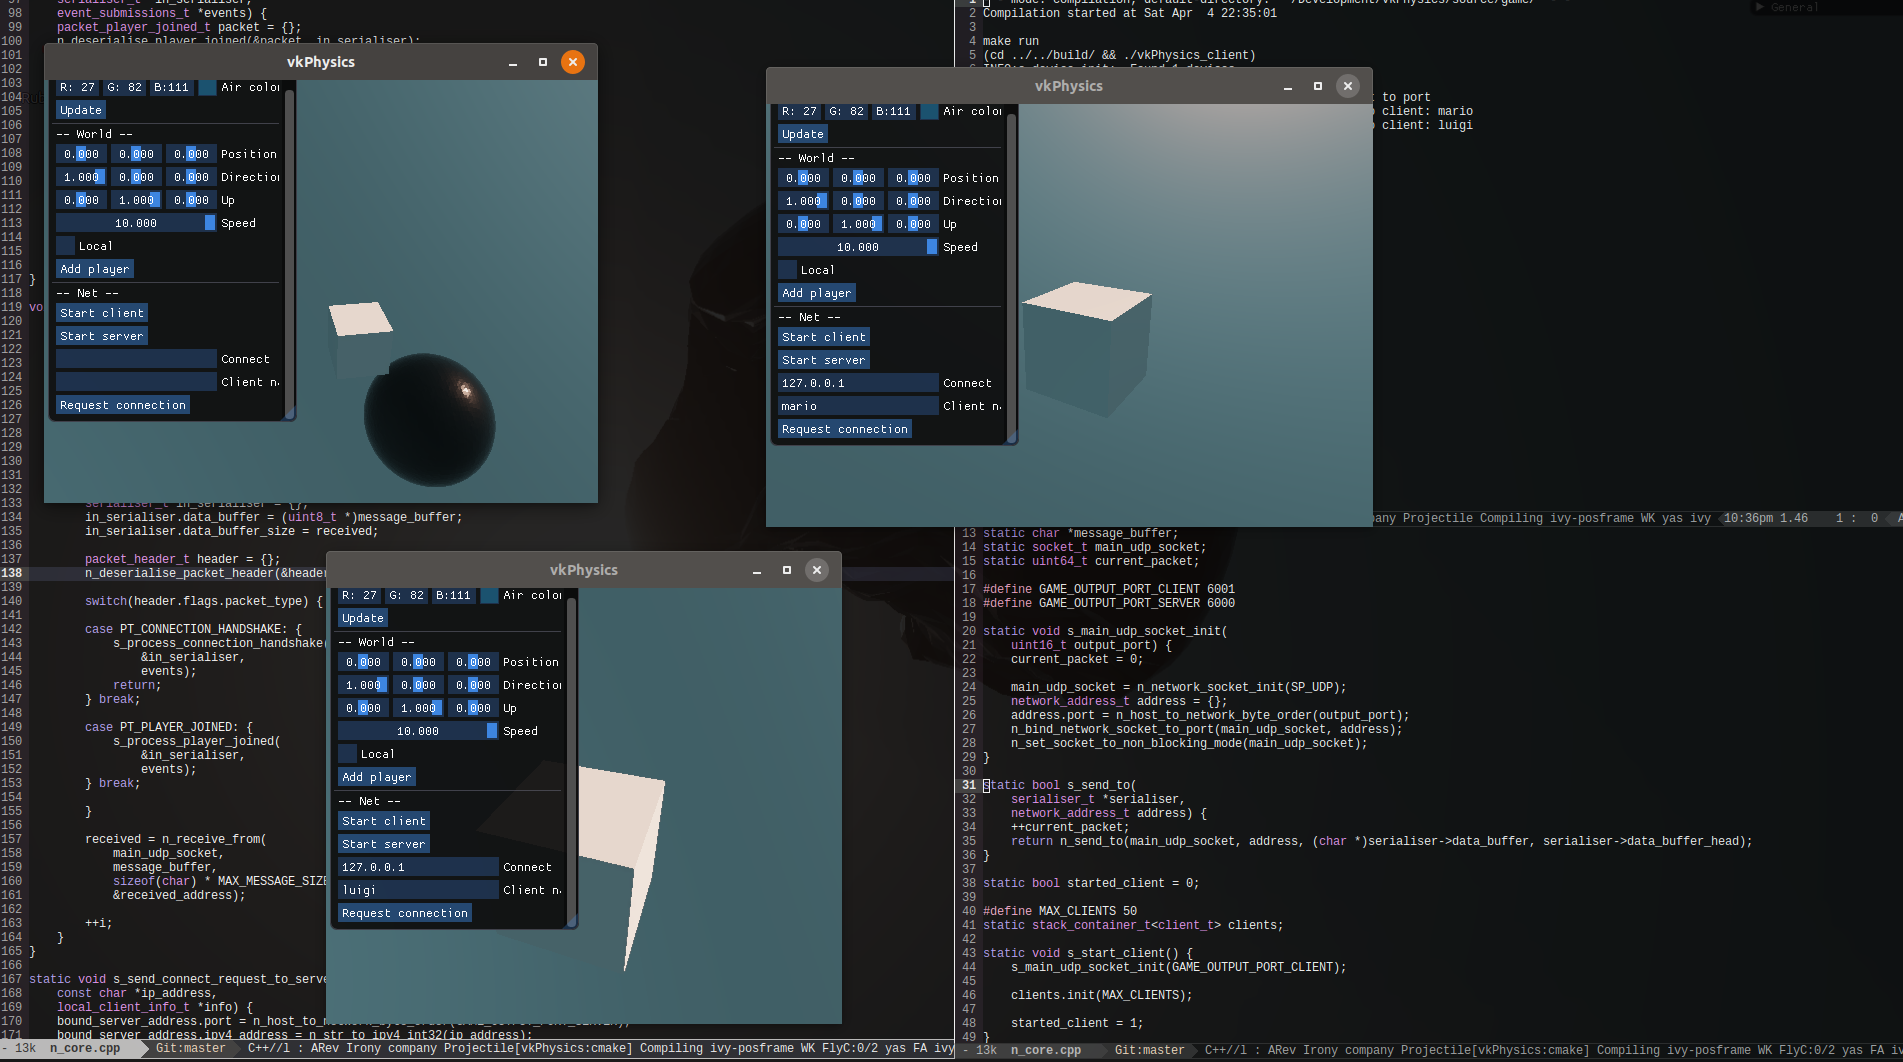
The top left window is the server, and the other two are clients. Each player is represented by a cube for now!
In the next article, I will cover player movement, and how one could go about synchronising this!